Hop Along, Harry and Sally Free E-Pattern From Linda Walsh of Linda Walsh Originals

Copyright © 2004 - 2012 - All Rights Reserved - Written By Linda Walsh 

Here's what Linda had to say about her free e-pattern:  If you're looking for a fun and easy bunny woodcraft to make for Easter my Hop Along, Harry and Sally might be perfect. "Hop Along, Harry and Sally" is a pattern to make two painted wood bunnies with painted wood feet, wired felt ears, and embroidered felt arms holding their favorite carrots. They also have miniature baskets with plastic Easter eggs. They're just adorable bunnies to make. Hop along and get yours now.

Please respect Linda's Terms of Use: All patterns, e-patterns, e-books, tutorials, how-to's, and e-products © 2004-2012 Linda Walsh Originals-Designs by Linda Walsh. All rights reserved, including downloading, mass producing, photocopying, enlargements, reductions,and all other forms of reproduction, website sharing, Email, RSS feeds, or any other means of redistribution. Commercial selling or reselling by any means, including eBay or any other website by permission only.

Products made from Linda Walsh Originals patterns, e-patterns, e-books, tutorials, how-to's, and e-products are intended for personal use for fun or small scale personal and business profit as long as you credit us with the design. Large scale commercial use (i.e. mass production) including wholesale distribution, catalog sales, and all other forms of large scale commercial production are by permission only. Items made from Linda Walsh Originals patterns, e-patterns, e-books, tutorials, how-to's, and e-products are intended for decoration only and are not intended for use by children. Not responsible for human error, individual workmanship, or printing errors in the E-books, E-products, tutorials, how-to's, patterns or the E-Patterns.

Copyright © 2012 - All Rights Reserved - Written By Linda Walsh of Linda Walsh Originals.  Linda Walsh Originals E-Patterns and Linda's Blog. Linda is a doll maker and doll pattern designer. http://lindawalshoriginals.com/

Mooo-ey Christmas Tutorial By June Crawford of A Creative Dream

Do you need a small gift for a co-worker or teacher this holiday season?  If so you might want to consider making June Crawford's "Mooo-ey Christmas" clay ornament that she shows us all how to make on her A Creative Dream's  blog   Have fun making your ornament.


Copyright © 2009 - All Rights Reserved - Written by June Crawford of A Creative Dream

Here's what June had to say about her tutorial:   Really bad, huh? Even for me...moo-ey....but hey, it's Christmas... The luncheon went well at work, although I have to tell ya, there was more cake left over than I'd expected. Usually, when I take treats in they are wolfed down within the hour (The Little One says you can feel the earth rumble as they all make their way to where the treats are)...we did have an awful lot of stuff there though, so I am going to attribute it to that...'cause the cake was darned good!

And, now...I am finishing up the ornaments I want to give my co-workers. This is the first one I got finished. My "real" job deals with agriculture, and one of the offices in the building deals specifically with milk. This ornament is for Cathy, who works in that office. It seemed only appropriate that I something cute using cows for her.

One of my favorite ornaments on my tree is a crescent moon with a cow dangling over it that I made several years ago (you can see the moon behind these cows)...the cow jumping over the moon. I liked how the cow turned out when I made it, and thought I'd use the same sort of thing for this. The moon one is made of salt dough, this one is made of polymer clay.

Please respect June's TERMS OF USE:  Please note, in regard to the copyright, all of the directions and photographs in my tutorials are mine, you may not copy or reproduce them without my consent. These instructions are for you to use for PERSONAL use only, not for profit.

June's Bio:  Me... a dreamer, a ponderer of big and small thoughts. A wanna-be artist, a soon to be empty-nester... wondering what the heck I am gonna do with the rest of my life...

Copyright © 2009 - All Rights Reserved - June Crawford of A Creative Dream.

Please visit  her A Creative Dream blog at http://acreativedreamer.blogspot.com/. Her A Creative Dream Flickr page is at  http://www.flickr.com/photos/creativedreamer/ .

Wee Bird Tutorial By Karen Bailey of Todolwen Blog

Some creations are just too cute. Such is the case with the wee birds that Karen Bailey shows everyone how to make on her Todolwen blog. I'm definitely adding these to my "to do" list for Christmas gifts this year.

Wee Bird Tutorial

Copyright © 2011 - All Rights Reserved - Written by Karen Bailey of Todolwen Blog

Here's what Karen had to say about her tutorial:  Hello my dear friends, at last I have finished the tutorial for my wee bird! It has taken me so much longer than I thought it would but sometimes things just don't work out the way we would like them to.

Please respect Karen's TERMS OF USE:  Please do not copy my tutorials in full and/or claim them to be your own and/or post them on your blog without my permission. Furthermore the sale of my tutorials is prohibited. All my designs are protected under copyright.

Karen's Bio: My name is Karen Bailey, and I am the wife for over 20 years to a now retired british serviceman and a Mum to two beautiful daughters. For many years we traveled and lived all over the world whilst serving in the army. After leaving the army we now live in Ontario, Canada. My passion is antiques, especially victorian unrestored furniture and household items and creating/crafting. For me there is nothing better when I have a moment to sit down and make something beautiful. My blog is 'Todolwen' which is an anogram made up from 'old to new' which is what I love to do ~ take something old and give it a new life. I hope you enjoy my makings as much as I enjoy creating them.

Copyright © 2011 - All Rights Reserved - Karen Bailey of  Todolwen Blog.

Please visit her Todolwen blog at http://todolwen.blogspot.com/.

Pudgy Penquin Box E-Pattern By Sue Allemand of Palette Primitives

When it comes to irresistible primitive, country, and folk art decorations penguins are high on the list. Wouldn't you agree? If you would then you'll be pleased to know that Sue Allemand has a terrific e-pattern on her Free Paintin' Patterns blog for creating a penguin box.


Copyright © 2010 - All Rights Reserved - Sue Allemand of Palette Primitives.

Here's what Sue had to say about her pattern:  Here's another FREE cutie patootie pattern for ya!  This adorable penguin box is so quick and easy to paint and assemble!!  Fill with candy, potpourri, electric candles...whatever!!  He's a cute addition to your winter decorating!  You could also add a hat on his head and a scarf!  Just don't use a REAL candle near him if you use fabric!!  Or you could put a stake through the bottom and fill with birdseed for a garden decoration!

Please respect Sue's TERMS OF USE: All designs are copyright protected by Sue Allemand. You are given the right to make the finished products for personal use or profit (selling on the internet is fine), however, no mass producing, copying, sharing or distributing of the pattern or design is allowed. Please give credit to the me whenever possible. Thank you!

Copyright © 1999-2012- All Rights Reserved - Sue Allemand of Palette Primitives. Sue is a professional artist and designer.

Please visit Sue's Palette Primitives website at http://paletteprimitives.com, her Palette Primitives "Get Your Prim On" blog at http://www.paletteprimitives.blogspot.com, her Free Paintin' Patterns blog at http://freepaintinpatterns.blogspot.com and her Free Stitchin' Patterns blog at http://freestitchinpatterns.blogspot.com.

Rooster Heaven E-Pattern By Sue Allemand of Palette Primitives

Who can resist adorable primitive, country, and folk art roosters? Not I.  If you can't either then you'll be happy to know that  Sue Allemand has a terrific e-pattern on her Free Stitchin' Patterns blog for creating a rooster doll, and 3 rooster pin designs.  How great is that?

ROOSTER HEAVEN

Copyright © 2010 - All Rights Reserved - Sue Allemand of Palette Primitives.

Here's what Sue had to say about her pattern:  New FREE one for ya! Includes Rooster Sitter Doll, Stuffed Rooster Pin AND 2 Stitchery Pin Designs (Primitive Chick and Country Chick)! This one will keep ya busy for a bit! hehe Lots of stuff to make and maybe new techniques to try! This one was a best seller back 10 years or so ago -- so I'm resurrecting it as a FREEBIE! Have fun!

Please respect Sue's TERMS OF USE: All designs are copyright protected by Sue Allemand. You are given the right to make the finished products for personal use or profit (selling on the internet is fine), however, no mass producing, copying, sharing or distributing of the pattern or design is allowed. Please give credit to the me whenever possible. Thank you!

Copyright © 1999-2012- All Rights Reserved - Sue Allemand of Palette Primitives. Sue is a professional artist and designer.

Please visit Sue's Palette Primitives website at http://paletteprimitives.com, her Palette Primitives "Get Your Prim On" blog at http://www.paletteprimitives.blogspot.com, her Free Paintin' Patterns blog at http://freepaintinpatterns.blogspot.com and her Free Stitchin' Patterns blog at http://freestitchinpatterns.blogspot.com.


New Birds Nest From Old Doilies Tutorial By Karen Bailey of Todolwen Blog

I love doilies and love decorating my home with them.  So, I was pleased to see that Karen Bailey had a wonderful tutorial on her Todolwen blog showing you how to make a birds nest from old doilies.  What an adorable decoration.

New Birds Nest From Old Doilies Tutorial

Copyright © 2011 - All Rights Reserved - Written by Karen Bailey of Todolwen Blog

Here's what Karen had to say about her tutorial:  Bring Out Your Doilies - A New Birds Nest Tutorial - Hello my dear friends, whilst working with my little coconut fibre pot on Tuesday and waiting for the tea stained eggs to dry I thought it would be nice to come up with a new little tutorial for you! After my Easter basket which was made from a stiffened doily my thoughts went with a nest made the same way.

Please respect Karen's TERMS OF USE:  Please do not copy my tutorials in full and/or claim them to be your own and/or post them on your blog without my permission. Furthermore the sale of my tutorials is prohibited. All my designs are protected under copyright.

Karen's Bio: My name is Karen Bailey, and I am the wife for over 20 years to a now retired british serviceman and a Mum to two beautiful daughters. For many years we traveled and lived all over the world whilst serving in the army. After leaving the army we now live in Ontario, Canada. My passion is antiques, especially victorian unrestored furniture and household items and creating/crafting. For me there is nothing better when I have a moment to sit down and make something beautiful. My blog is 'Todolwen' which is an anogram made up from 'old to new' which is what I love to do ~ take something old and give it a new life. I hope you enjoy my makings as much as I enjoy creating them.

Copyright © 2011 - All Rights Reserved - Karen Bailey of  Todolwen Blog.

Please visit her Todolwen blog at http://todolwen.blogspot.com/.

Bird Ornament Tutorial By Thespoena McLaughlin of Vintiquities Workshop

I just LOVE mixed media creations and I'm always in awe at the creativity involved with them.  If you like mixed media ornaments then you're going to love the bird ornament tutorial that Thespa McLaughlin has on her of Vintiquities Workshop.  Aren't they beautiful?

Bird Ornament Tutorial - New PDF pattern UPDATE!

Copyright © 2010 - All Rights Reserved - Written by Thespoena McLaughlin of Vintiquities Workshop.

Here's what Thespa had to say about her tutorial:  Today I'm going to share a pattern and how-to for my bird ornaments.

Please respect Thespa's TERM OF USE: My patterns & tutorials are for personal use ONLY. Not for resale. If you want to share it online please give full credit complete with a link to Vintiquities Workshop at http://vintiquitiesworkshop.blogspot.com .

Thespa's Bio: I am a mixed media artist living with my family in the Ozarks. I love aged turquoise, faded cream, and lots of romantic layers. I dig rusty things and found objects and frequently use them in my art.

Copyright © 2012 - All Rights Reserved - Thespoena McLaughlin of Vintiquities Workshop.

Please visit her Vintiquities Workshop at http://vintiquitiesworkshop.blogspot.com/.  You can also follow her on Pinterest here.

Country Ornament Collection #1 and #2 E-Patterns By Sue Allemand of Palette Primitives

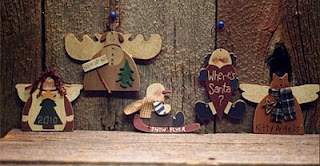
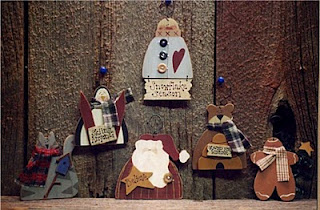
The next free e-patterns from Sue Allemand reminds me of when I was a young girl and had a wood  kit to paint like twelve different ornaments.  Believe it or not but over 40 years later I still have those ornaments.  If you love creating painted wood ornaments then you're going to love the two terrific e-patterns Sue has on her Free Paintin' Patterns blog.  Have fun painting!


Copyright © 2010- All Rights Reserved - Sue Allemand of Palette Primitives.

Here's what Sue had to say about her pattern:  FREE Pattern!!  Sorry I haven't posted in a bit!  November was a busy busy month!!  Here's some FREE ornament designs for you!  This is an old pattern - but I still think the designs are cute!  You don't have to cut them from wood if you don't want to!  Just use purchased ornies in squares, rectangles, rounds - or whatever you can find!  Have fun!!


Copyright © 2010 - All Rights Reserved - Sue Allemand of Palette Primitives.

Here's what Sue had to say about her pattern:  Here's the 2nd set of FREE ornies for you!  Country Ornament Collection #2!  Penguins, Gingers, Bears, Snowmen, Kitties & Santa himself!  This is another Oldie but Goodie!  Have fun painting these on wood blanks, glass ornies, or cut the wood pieces yourself!  Just have fun!!

Please respect Sue's TERMS OF USE: All designs are copyright protected by Sue Allemand. You are given the right to make the finished products for personal use or profit (selling on the internet is fine), however, no mass producing, copying, sharing or distributing of the pattern or design is allowed. Please give credit to the me whenever possible. Thank you!

Copyright © 1999-2012- All Rights Reserved - Sue Allemand of Palette Primitives. Sue is a professional artist and designer.

Please visit Sue's Palette Primitives website at http://paletteprimitives.com, her Palette Primitives "Get Your Prim On" blog at http://www.paletteprimitives.blogspot.com, her Free Paintin' Patterns blog at http://freepaintinpatterns.blogspot.com and her Free Stitchin' Patterns blog at http://freestitchinpatterns.blogspot.com.

Pam's Peacock Tutorial For Crazy Quilting By Pamela Kellogg of Kitty and Me Designs

I can sit for hours and hours just looking at all the amazing creatures that crazy quilter's like to include in their designs.  One such creature is a peacock.  I have always wanted to learn how to embroider one so I was pleased to see that Pamela Kellogg has a tutorial on her Kitty & Me Designs blog showing you how to embroider an exquisite peacock.  Now that I know how to do this I'm definitely going to be trying this.  How about you?

Pam's Peacock Tutorial For Crazy Quilting

Copyright © 2010 - All Rights Reserved - Written by Pamela Kellogg of Kitty & Me Designs.

Here's what Pamela had to say about her tutorial:  Hello everyone! As promised, I've put together the tutorial for the peacock that I use on my crazy quilts. Peacocks were a very popular motif with the Victorians. They loved anything exotic! I've seen photos of Victorian crazy quilts with embroidered peacocks, satin stitched peacocks, cross stitched peacocks and painted peacocks! I myself have even used real peacock feathers on my crazy quilts.

This particular project is my own original design. I own the copyright! Please do not sell the pattern or the instructions. You may of course post a link on your blog or website to this tutorial. All I ask is that you give me credit as the designer.

I've taken a lot of photos to make it easy to understand so here goes!


Please respect Pamela's TERMS OF USE:  I like to share Craft and Embroidery Tutorials on how I do a variety of projects and techniques and helpful hints. I add to this list regularly. Please feel free to download the directions and if you try them, please let me know if you enjoyed the project!

Pamela's Bio:Designer, Textile Artist and Instructor. Although I love all forms of needlework and embroidery, my true passion is Crazy Quilting. I enjoy a quiet life in our little cottage by a lake in Northern Illinois. I frequent flea markets and antique shops looking for do-dads that I can sew on to my stitching projects. I offer some of my handmade items, along with my mom's and my sister's, in my Etsy shop. I enjoy baking and share many of my recipes here. And did I mention glitter?

Copyright © 2005 - 2012 - All Rights Reserved - Pamela Kellogg of Kitty & Me Designs .

Please visit her Kitty & Me Designs blog at http://kittyandmedesigns.blogspot.com/ and her Kitty & Me Designs Etsy shop at http://www.etsy.com/shop/kittyandme.

Dying With Kool-Aid Free Tutorial by Lisa Bunting Thoms of Q.D. Patooties

Ever wonder how to dye your teddy bears?  If you have then you'll be happy to know that Lisa Bunting Thoms of  Q.D. Patooties  has a wonderful  tutorial telling you how.


Dying With Kool-Aid
Copyright © 2007 - All Rights Reserved - Lisa Bunting Thoms of Q.D. Patooties


Here's what Lisa had to say about Dying With Kool-Aid:  Can't you just see that huge pitcher of frosty cold sugary goodness come crashing through a wall in my house? Of course my kids would be thrilled to bits since I make them drink healthy stuff like milk. Awwwwww Mom! Anyway, this isn't about my kids or a huge multi-million dollar ad campaign. This is about using Kool-Aid to color mohair and just about anything else that gets in the way. I had a scare earlier this year when I kept going to supermarkets and seeing the Kool-Aid being marked down and put in the clearance aisle. There was a new Kool-Aid on the shelf which had all the flavor but none of the color! I gasped in horror as besides RIT dye, Kool-Aid has been a staple in my teddy tool box for years as it produces some wonderful colors that will NOT wash out. Seriously. It would take all the Clorox in the world and perhaps some other super high tech industrial strength stain removers to get this stuff out! I've had a bear that I tie-dyed in Kool-Aid and had sitting in the sun when I lived in Charleston that did NOT fade. Yikes! Extremely powerful and can only make you wonder what it does to your internals. Luckily, I don't drink it, I just use it to dye mohair and fabric.

For my dye recipe, I do my dying on the stove top in a huge pot. I use 1 packet per quart of water plus I add 1/4 cup of vinegar. So if you were using a gallon of water you'd add 4 packets of Kool-Aid plus one cup of vinegar. I heat that up on the stove top and let it cool down. Once it's cooled down so it's not boiling hot (because if you put your mohair in when it's boiling hot it will frizz your mohair - at least that's what I've learned over the years) you can put some wet mohair into your pot and stir it around. If you're using your hands, wear gloves or they will be stained too! I leave it in for about an hour and then rinse it out thoroughly until your water runs clear, brush the mohair in the direction you want and hang it to dry outside. To tie-dye a piece of fabric, I wet a piece of white fabric and then starting at a corner I twist it like you are going to snap a towel at someone (c'mon, now who hasn't done that at the pool when you were a kid?). I use rubber bands intermittently along my twist to create white creases. I usually have three different dye baths on the stove including one red, one blue and one yellow. Then, I dip the fabric in each bath starting at the end, sometimes overlapping colors and sometimes just having a single color until I get to the end. I put the wet twisted fabric into a plastic container and take it to the sink where I rinse it until the water comes clear, cut off the rubber bands and unwind it to reveal the pattern I've created. Then just brush it and hang it outside to dry.

Riley, the bear pictured in the photo above, was done a couple of years ago using the 2 packs of Black Cherry and 2 packs of Fruit Punch. The red fabric was vibrant! If you want a softer effect, use less Kool-Aid.

P.S. If you can't find Kool-Aid in your area and you're thinking of using Jello instead, think again. Jello has sugar and I think that the sugar residue will remain in your fabric making it a target for bugs. Just my opinion though...

Please respect Lisa's TERMS OF USE:  My FREE tutorials, patterns, and how-to's are for personal use only and are not not intended for commercial use. They may not be copied, reprinted, emailed, or reproduced and distributed in any manner without my permission.

Lisa's Bio: Lisa is a professional teddy bear artist selling heirloom quality collectible bears to Adults and has been making bears professionally since November 1997. Her creations have been nominated for several Awards including the TITA, Teddy Bear Scene Reader's Choice Awards and the Ace Awards. They've also been included on a regular basis in many of the major doll and crafts magazines.

Copyright © 2007-2012 - All Rights Reserved - Lisa Bunting Thoms of Q.D. Patooties at http://qdpatooties.blogspot.com.

Please visit Lisa's Q.D. Patooties Spoonflower Fabric Shop and her Q.D. Patooties Etsy Shop.

No Sew Molded Felt Ornament Tutorial From Lisa Bunting Thoms of Q.D. Patooties

If you like no sew ornaments you'll be happy to know that Lisa Bunting Thoms of  Q.D. Patooties  has a wonderful wool felt and roving holiday project to share.  I hope you enjoy making her "No Sew Molded Felt Ornaments."


No Sew Molded Felt Ornament Tutorial
Copyright © 2007 - All Rights Reserved - Lisa Bunting Thoms of Q.D. Patooties

Here's the instructions and what Lisa had to say about her No Sew Molded Felt Ornament Tutorial:  This is a very simple and fun to make no sew molded felt ornament that I was experimenting with last year. The process I used to create the ornament was simple and I ended up teaching the project to my friends in the soft cloth doll group I belong to called the Potomac Poppets. So here's the materials and instructions you'll need to create one of your own:

Materials
----------
Clay Cookie Mold (tons available on E-bay)
Metal Cookie Sheet
Liquid Starch (local grocery store - My Target and Walmart don't carry this product)
Wool Felt (at least 20% wool and I purchased mine at Joann's Fabrics)
Prismacolor Markers or Pencils
Glue (any will do just so it dries clear)
Ribbon (thin enough to be threaded through a large-eyed needle)
Clear Glitter (if you want)
Spray Adhesive
Scissors
Oven Set at 275 degrees

Instructions
-------------
Place your cookie mold on top of a metal cookie sheet . Cut your wool felt to overlap your mold at least by 1 inch(see Figure 1). Then, soak your wool felt in liquid starch (see Figure 2) . I tried a 50/50 mix of liquid starch and water on the first one and it didn't work nearly as well. Then, squeeze out as much of the starch as you can and place your felt on top of the mold (see Figure 3). Work the felt into the mold until you can see the design (see Figure 4). Place in the oven that has already been preheated to 275 degrees. When I taught this at our doll club, we used a toaster oven and it took much longer to dry out but it usually only takes about 15 - 20 minutes. To save time, you could do several at once depending on the size of your mold and of your cookie sheet. Once it is completely dry, the felt will just pop out of the mold (see Figure 5). When you turn it over, you will be able to see the design of the cookie mold pressed into the felt (see Figure 6). Here's the fun part which is decorating your ornament. Previously, I tried both watercolor pencils that you have to wet as well as Prismacolor Markers but found they made quite a mess so I wouldn't recommend them as they made the ornament too wet and ran too much. For the ornaments you see above, I used Prismacolor Pencils which have a more subtle look (see Figure 7). Anyway, fill in the detail of your ornament using whatever media you prefer (pencils or markers). When your finished, lay your ornament on top of another piece of wool felt and trace around it as this will be your backing. Glue the front piece of your ornament to the back coming as close to the ridge of the mold as possible. Once it is dry, cut around it with a pair of sharp scissors or get fancy and use your Pinking Sheers if you have them. Then, if you'd like, spray your ornament very lightly with the Spray Adhesive and sprinkle with some clear glitter (see Figure 8). Thread your needle with the ribbon or gold cording and go through the top of the ornament so you can hang it on your tree (see Figure 9). And now you have a molded felt ornament!

You can also use these to decorate your packages for the holidays or on a wreath or something. Just a little project I thought of in my "spare time." I'd love to see what you come up with though so if you make some, send me a pic! I'll have some pics of the ones I make this year in my Blog for all to see (when I find more of that "spare time").


Please respect Lisa's TERMS OF USE:  My FREE tutorials, patterns, and how-to's are for personal use only and are not not intended for commercial use. They may not be copied, reprinted, emailed, or reproduced and distributed in any manner without my permission.

Lisa's Bio: Lisa is a professional teddy bear artist selling heirloom quality collectible bears to Adults and has been making bears professionally since November 1997. Her creations have been nominated for several Awards including the TITA, Teddy Bear Scene Reader's Choice Awards and the Ace Awards. They've also been included on a regular basis in many of the major doll and crafts magazines.

Copyright © 2007-2012 - All Rights Reserved - Lisa Bunting Thoms of Q.D. Patooties at http://qdpatooties.blogspot.com.

Please visit Lisa's Q.D. Patooties Spoonflower Fabric Shop and her Q.D. Patooties Etsy Shop.

Four Free Hat Patterns For Blythe From Lisa Bunting Thoms of Q.D. Patooties

I thought you might all like to know that Lisa Bunting Thoms of Q.D. Patooties has four wonderful free patterns to share for making 3 crocheted and 1 sewn hat for BLYTHE. I hope you enjoy making all of Blythe's hats.


Cloche Hat (Crochet)
Copyright © 2008-2009 - All Rights Reserved - Lisa Bunting Thoms of Q.D. Patooties

Here's the instructions and what Lisa had to say about her clothe hat:  This is a very easy beginners FREE crochet pattern that whips up in just over an hour. Since I have been bitten by the "Blythe Bug" as I mentioned yesterday, it was only a matter of time before I started creating things for her and this just happens to be the first of probably many patterns. 

Materials:
Patons "Classic Wool" Merino, 100% Wool, 3 1/2 oz. (100g) in Blue Marl (variegated white/blue)

Size D/3 (3.25mm) Crochet Hook
Directions:

To Begin, Ch10 and join the first and last stitches to form a loop.
Rd. 1: Ch 3 and then 15 DC inside the loop.

Rd. 2: Ch 3 and then 1 DC inside the first DC followed by a SC all the way around. So you should have a stitch followed by a hole.

Rd. 3: Ch 3 and then in the new hole that you’ve made do 2 DC followed by 1 SC then 2 DC in the next followed by 2 SC. It will start to look almost like a lace doily.

Rd. 4: Ch 3 and then in the first that you’ve made do 3 DC followed by 1 SC then 3 DC in the next followed by 2 SC .

Rd. 5 - 6: Ch3 and then in the first stitch that you’ve made do 3 DC followed by 2 SC all the way around. You’re gradually “increasing” the size of your doll’s hat.

Rd. 7 - 10: Rd. 4: Ch 3 and then in the first stitch that you’ve made do 3 DC followed by 1 SC then 3 DC in the next followed by 2 SC.

Rd. 11: For the shell trim, SC in the first stitch, HDC in the second stitch, 1 DC, 1 TDC, 1 DC in the third stitch, HDC in the fourth stitch and a SC in the fifth stitch. Repeat all the way around the rim of the hat.
Since this hat is "lacy" and has some holes, you can weave some coordinating ribbon through the openings and tie it in a bow to add a little decorative touch. Enjoy!

Kisses from Elvish Beret (Crochet)
Copyright © 2008-2009 - All Rights Reserved - Lisa Bunting Thoms of Q.D. Patooties

Here's the instructions and what Lisa had to say about her kisses from elvish beret:   Here's a little beret I just finished for my Blythes. It kind of looks like a little Hershey's Kiss Elf hat so of course the name "Kisses from Elvish" seemed appropriate.

Kisses from Elvish Beret


Materials Needed:
3.75mm (Size F) Crochet Hook
Joann’s Fabrics Sensations Angel Hair Yarn Color 4361 or similar


To start: Ch4. Join first link to last to form a ring.
Round 1: 8 DC in ring. Join first to last and then Ch3.
Round 2: DC in each stitch. Join first to last and then Ch3.
Round 3: DC in first DC then Ch1; repeat until round is complete. Join first to last and then Ch3.
Round 4: Repeat Round 3.
Round 5: DC in each stitch. Join first to last and then Ch3.
Round 6: DC in each stitch. Join first to last and then Ch3.
Round 7: DC in first DC then Ch1; repeat until round is complete. Join first to last and then Ch3.
Round 8: DC in each stitch. Join first to last and then Ch3.
Round 9: DC in first 4 stitches, Skip 1. Repeat until the round is complete. Join first to last and then Ch2.
Round 10: HDC in each stitch, join and tie off when round is complete. 


Your stylish “Kisses from Elvish Beret” is now ready to wear!


Simple Winter Cap (Crochet)
Copyright © 2008-2009 - All Rights Reserved - Lisa Bunting Thoms of Q.D. Patooties

Instructions:
Materials:
Medium Weight Yarn (4)
Size H, 5.00mm Crochet Hook

Ch 4. Join to form a loop.
Row 1. 13 DC inside of loop. Ch 2.
Rows 2 - 4. 1 DC in first stitch, 2 DCs in second stitch. Continue until row is complete. Ch 2.
Rows 5 - 7. 1 DC in each stitch. Continue until row is complete. Ch 2.
Row 8. 1 DC in the "front" of the first three stitches followed by 1 DC in the back of the next three stitches. Repeat pattern until row is complete. Pattern will resemble fake "ribbing." Tie off. Enjoy!


Spidey Hat (Sewing) 
Copyright © 2008-2009 - All Rights Reserved - Lisa Bunting Thoms of Q.D. Patooties


Here's the instructions and what Lisa had to say about her Spidey Hat: For this project, you'll need a pair of one size fits all knit gloves and a single mitten from a one size fits all set of knit mittens. The gloves will serve as the "body" of your spider and then the mitten will be the lining of your hat. I found my gloves and mitten sets at Target. They are $1.49 and you get two pairs so you'll be able to make two complete hats for your Blythe dolls for less than $5.00. Other supplies you'll need include a some sharp scissors, some clear drying tacky or fabric glue, two 1-inch Pom-Poms for eyeballs, two 1/2-inch Pom-Poms for pupils, a small amount of Polyfil stuffing, a needle, some thread, embroidery floss, and a stuffing stick. If you'd like to use your sewing machine, you can use that too. This project is small enough though that it can be completed quickly in under an hour without a sewing machine. So, it's up to you.

1)  Cut the cuffs off of your gloves as well as the thumb (sorry I didn't show that step) and then cut the top off of your mitten (almost down to the thumb joint on the mitten). As I mentioned, the gloves will be the body of your spider and the mitten top will be the liner of your hat.

2)  With right sides together, sew your gloves up the center seam to form your spider body.

3)  Then, turn your spider body inside out and insert your mitten top as shown in the photo above. Sew all the way around leaving about an 1 1/2 opening so you can turn your hat.

4)  When you turn your hat, it should look like the photo above. It almost looks like an octopus instead of a spider! But that might be another tutorial (heh, heh, heh). Using your stuffing stick, go through the small hole you left to turn your spider and fill his "legs" with a small amount of Polyfil. You don't want to stuff them too much or they won't stand up right. Also, the white stuffing will show through your knit fabric. Then, ladder stitch your hole shut.

5)  Using some embroidery floss, make a silly grin on your spider's face. Glue together the eyes and let them dry so you can glue them on top of your hat.

6)  One you glue the eyes on top of your hat and they dry, it will be ready to wear. Enjoy!

Please respect Lisa's TERMS OF USE:  My FREE tutorials, patterns, and how-to's are for personal use only and are not not intended for commercial use. They may not be copied, reprinted, emailed, or reproduced and distributed in any manner without my permission.

Lisa's Bio: Lisa is a professional teddy bear artist selling heirloom quality collectible bears to Adults and has been making bears professionally since November 1997. Her creations have been nominated for several Awards including the TITA, Teddy Bear Scene Reader's Choice Awards and the Ace Awards. They've also been included on a regular basis in many of the major doll and crafts magazines.

Copyright © 2007-2012 - All Rights Reserved - Lisa Bunting Thoms of Q.D. Patooties at http://qdpatooties.blogspot.com.

Please visit Lisa's Q.D. Patooties Spoonflower Fabric Shop and her Q.D. Patooties Etsy Shop.

Lil' Lop Eared Bunny - Free Pattern From Lisa Bunting Thoms of Q.D. Patooties

I thought you might all like to know that Lisa Bunting Thoms of  Q.D. Patooties  has an adorable bunny pattern to share. I just love Lisa's creations and hope you enjoy her bunny pattern.


FREE New Pattern, Lil' Lop Eared Bunny


Copyright © 2008-2009 - All Rights Reserved - Lisa Bunting Thoms of Q.D. Patooties

Click on picture above to enlarge.

Here's what Lisa said about Lil' Lop Eared Bunny:   This pattern is a one that I shared with my newsletter members last year for a small vintage style bunny just the right size to fill any Easter Basket. You may remember seeing this little vintage style Easter Bunny on my Blog and briefly in my Etsy shop. I modeled him after a really sweet bunny I had as a kind (mine was blue with a white tummy) but truthfully, I think this guy turned out looking more like Eeyore! You can also turn the ears upright so he looks less like the famous Pooh Bear sidekick and hey, it's FREE so enjoy!

All you need to do is to click on the pattern. After you click, the pattern will enlarge. Then, just right click and "Save Image As" to save it to your computer. Then print it out. 

Please respect Lisa's TERMS OF USE:  My FREE tutorials, patterns, and how-to's are for personal use only and are not not intended for commercial use. They may not be copied, reprinted, emailed, or reproduced and distributed in any manner without my permission.

Lisa's Bio: Lisa is a professional teddy bear artist selling heirloom quality collectible bears to Adults and has been making bears professionally since November 1997. Her creations have been nominated for several Awards including the TITA, Teddy Bear Scene Reader's Choice Awards and the Ace Awards. They've also been included on a regular basis in many of the major doll and crafts magazines.

Copyright © 2007-2012 - All Rights Reserved - Lisa Bunting Thoms of Q.D. Patooties at http://qdpatooties.blogspot.com.

Please visit Lisa's Q.D. Patooties Spoonflower Fabric Shop and her Q.D. Patooties Etsy Shop.

Crocheted Sock Monkey Free Pattern by Lisa Bunting Thoms of Q.D. Patooties

If you like to crocheted animals then you'll be pleased to know that Lisa Bunting Thoms of  Q.D. Patooties has another wonderful crochet pattern to share.  This =one is for an adorable monkey.

Crocheted Sock Monkey Pattern


Here's the instructions and what Lisa had to say about her Crocheted Sock Monkey Pattern:  Well, I've had a couple of people, some of whom mentioned they have smaller computer screens, complain that they cannot read the entire Sock Monkey pattern because the photos overlap the words. So I decided, in my infinite wisdom, to just do a post of the pattern verbage without the pictures for those of you who are picture impaired. Sorry about that guys! I really have my screen resolution adjusted so it's the same as a majority of people who visit my website. If any other patterns or tutorials do not show up as you think they should, please let me know and I'll be happy to try to help.

Crocheted Sock Monkey Pattern by Lisa Thoms
Materials Needed:

Patons "Classic Wool" Merino, 100% Wool, 3 1/2 oz. (100g) in Natural Marl (variegated white/brown), Winter White, and Bright Red
Size F/5 (3.75mm) Crochet Hook
Sewing Needle
Polyfil

Symbols:
sl st = slip stitch; ; st = stitch; ch = chain; hdc = half double crochet; dc = double crochet; tc = treble crochet

Head:
Round 1: Using your Winter White Yarn, Ch 4 connecting the first stitch to the last with a sl st to form a ring. Ch 2 and then 15 hdc in the center of the ring. Join the first hdc to the last to form a circle.
Round 2: Ch 3. In each stitch, do 2 dc joining the first st to the last st with a sl st.
Rounds 3 + 4: Ch 3. In each stitch, do 1 dc joining the first st to the last st with a sl st.
Round 5. Switch to the Natural Marl yarn I used or a yarn color of your choice. After joining the yarns, ch 3. Do 2 dc in the first stitch and then 1 dc in the next 3 stitches. Repeat the pattern joining the first st to the last st with a sl st.
Rounds 6 + 7. Ch 3. In each stitch, do 1 dc in each stitch joining the first st to the last st with a sl st.
Rounds 8 + 9. Ch 3. In the next 3 stitches do 1 dc then skip a stitch. Repeat the pattern joining the first st to the last st with a sl st.

Head Muzzle and Mouth:
Ch 9 in Bright Red. In the 7th st, do 1 hdc followed by a dc in the next 5 stitches and finally a hdc in the last stitch. Change yarns from Bright Red to Winter White. After joining the yarns, go around the red crocheted section with a SC in each stitch until you have outlined the whole mouth in Winter White. Ch 1 and repeat going around the mouth 2 1/2 more times stopping halfway through the third round.

Ears:
Using your Winter White yarn, ch 7. In the 5th st, do a hdc followed by a dc in the 4th st, a tc in the 3rd st, a dc in the 2nd st stitch and a hdc in the 1st st. It will have the appearance of a half circle.

Body:
Round 1: Using your Natural Marl yarn, Ch 4 connecting the first stitch to the last with a sl st to form a ring. Ch 2 and then 12 hdc in the center of the ring. Join the first hdc to the last to form a circle.
Round 2 +3: Ch 3. Do 2 dc in the first stitch followed by 1 dc in the next stitch repeating the pattern until you've reached the end of the round joining the first st to the last st with a sl st.
Rounds 4 + 5: Ch 3. In each stitch, do 1 dc joining the first st to the last st with a sl st.
Rounds 6. Ch 3. In the next 3 stitches do 1 dc then skip a stitch. Repeat the pattern joining the first st to the last st with a sl st.
Rounds 7. Ch 3. In each stitch, do 1 dc in each stitch joining the first st to the last st with a sl st.
Rounds 8 + 9. Ch 3. In the next 3 stitches do 1 dc then skip a stitch. Repeat the pattern joining the first st to the last st with a sl st.

Arms and Legs:
Round 1: Using your Winter White yarn, Ch 4 connecting the first stitch to the last with a sl st to form a ring. Ch 2 and then 10 hdc in the center of the ring. Join the first hdc to the last to form a circle.
Rounds 2 + 3: Ch 3. In each stitch do 1 dc joining the 1st st to the last st with a sl st.
Rounds 4 - 10: Changing the yarn to the Natural Marl, ch 3 and the repeat the same pattern in Rounds 2 + 3.

Tail:
Round 1: Using your Winter White yarn, Ch 4 connecting the first stitch to the last with a sl st to form a ring. Ch 2 and then 10 hdc in the center of the ring. Join the first hdc to the last to form a circle.
Rounds 2 - 4: Ch 3. In each stitch do 1 dc joining the 1st st to the last st with a sl st.
Rounds 5 - 12: Changing the yarn to the Natural Marl, ch 3 and the repeat the same pattern in Rounds 2 + 3.

Assembly:
Using the long tail of yarn from the knotted off last stitch, sew the openings of the arms, legs and tail closed. I did not stuff mine or put any weight in them. If you prefer with your monkey, do so before you sew it shut.
Next, stuff your head with Polyfil and then sew on your ears. Sew your muzzle on and leave an opening to stuff it. After it is stuffed, sew it closed.

Stuff your body next. I wanted to add a little bit of weight to my monkey so I used a new knee high filled with a mixture of steel shot and plastic pellets, tied it off, and placed it in my monkey's body instead of Polyfil .
Now, sew your head to your body and then sew on your arms, legs and tail. Your crocheted sock monkey is almost complete. It's now up to you to give him a personality by adding a some button eyes, a red pom pom to the top of his hat, little red bows around his arms and legs, and maybe a little jingle bell collar around his neck.

Please have fun making monkeys for your own personal enjoyment but respect my creativity and give me credit if you mention this pattern on your Blog or website. And if you do make a monkey for yourself or a gift, please send me a picture and I'll post it on my Blog giving you a link and a little write up describing your "creation!"

Please respect Lisa's TERMS OF USE:  My FREE tutorials, patterns, and how-to's are for personal use only and are not not intended for commercial use. They may not be copied, reprinted, emailed, or reproduced and distributed in any manner without my permission.

Lisa's Bio: Lisa is a professional teddy bear artist selling heirloom quality collectible bears to Adults and has been making bears professionally since November 1997. Her creations have been nominated for several Awards including the TITA, Teddy Bear Scene Reader's Choice Awards and the Ace Awards. They've also been included on a regular basis in many of the major doll and crafts magazines.

Copyright © 2007-2012 - All Rights Reserved - Lisa Bunting Thoms of Q.D. Patooties at http://qdpatooties.blogspot.com.

Please visit Lisa's Q.D. Patooties Spoonflower Fabric Shop and her Q.D. Patooties Etsy Shop.

Tippy The Snow Bunny - Free Pattern From Lisa Bunting Thoms of Q.D. Patooties

I just LOVE adorable "softies."  If you do, too, then you'll be happy to know that Lisa Bunting Thoms of  Q.D. Patooties has another wonderful "softie" pattern to share. I just love Lisa's creations and "Tippy" is just too cute!

Tippy The Snow Bunny
Copyright © 2008-2009 - All Rights Reserved - Lisa Bunting Thoms of Q.D. Patooties


Here's the instructions and what Lisa said about Tippy The Snow Bunny: This pattern is a one that I shared with my newsletter members last year for a cute kid bundled up in a bunny snow suit. You may remember seeing Tippy, the True Blue Snow Bunny on my Blog and briefly in my Etsy shop. Just follow the instructions to make your own Tippy. 

All you need to do is to click on the pattern below and save it to your computer. After you click, the pattern will enlarge.  You should be able to right click, save the image and then print it out. I usually print mine out on card stock so it's easier to trace onto fabric.

You can either insert the face from the back as I did or you can omit cutting out the face in the main body piece of the pattern and just top stitch the face pattern onto the body pattern. There is no seam allowance included in the pattern. I usually just trace it onto the felt fabric and then sew on the line. Also, I used floral wire in my feet so they could be bent and posed. If you have some pipe cleaners they work just as well and then you don't have to stuff the feet as much!

 Click on picture above to enlarge.

Please remember though that the patterns I share with you are for your own personal enjoyment and not to be sold for profit.

Enjoy!!!

Please respect Lisa's TERMS OF USE:  My FREE tutorials, patterns, and how-to's are for personal use only and are not not intended for commercial use. They may not be copied, reprinted, emailed, or reproduced and distributed in any manner without my permission.

Lisa's Bio: Lisa is a professional teddy bear artist selling heirloom quality collectible bears to Adults and has been making bears professionally since November 1997. Her creations have been nominated for several Awards including the TITA, Teddy Bear Scene Reader's Choice Awards and the Ace Awards. They've also been included on a regular basis in many of the major doll and crafts magazines.

Copyright © 2007-2012 - All Rights Reserved - Lisa Bunting Thoms of Q.D. Patooties at http://qdpatooties.blogspot.com.

Please visit Lisa's Q.D. Patooties Spoonflower Fabric Shop and her Q.D. Patooties Etsy Shop.

Wimbley - Free Pattern by Lisa Bunting Thoms of Q.D. Patooties

I thought you might all like to know that Lisa Bunting Thoms of Q.D. Patooties has another wonderful pattern to share. His name is Wimbley and he's just the cutest little bear.


Wimbley, A New Free Pattern!


Click on picture above to enlarge


Here's the instructions and what Lisa had to say about Wimbley: Here's a new free pattern just for you guys! A little bear I've named Wimbley that's small enough to make up as a pin or use as a stuffie for your favorite bear or doll. I originally made him up for my Blythe dolls.

All you need to do is to click on the pattern above and save it to your computer. After you click, the pattern will enlarge. Then, just right click and "Save Image As" to save it to your computer.

To make him, you'll need a small piece of felt folded in half. Cut out your Wimbley pattern and trace it directly on to the felt. Follow the pattern lines with your sewing machine and make sure to leave an opening to turn and stuff him. I left my opening on one of the sides. Cut out your bear as close to the seams as possible to make it easier to turn his little arms and legs. Stuff him and then sew up the side. Next, give him a personality by embroidering a face and maybe a boo-boo on his arm or leg. Wimbley's a popular little guy so you want him to look well loved.

Enjoy!

Please respect Lisa's TERMS OF USE:  My FREE tutorials, patterns, and how-to's are for personal use only and are not not intended for commercial use. They may not be copied, reprinted, emailed, or reproduced and distributed in any manner without my permission.

Lisa's Bio: Lisa is a professional teddy bear artist selling heirloom quality collectible bears to Adults and has been making bears professionally since November 1997. Her creations have been nominated for several Awards including the TITA, Teddy Bear Scene Reader's Choice Awards and the Ace Awards. They've also been included on a regular basis in many of the major doll and crafts magazines.

Copyright © 2007-2012 - All Rights Reserved - Lisa Bunting Thoms of Q.D. Patooties at http://qdpatooties.blogspot.com.

Please visit Lisa's Q.D. Patooties Spoonflower Fabric Shop and her Q.D. Patooties Etsy Shop.

Christmas Mouse Ornament Free Pattern From Lisa Bunting Thoms of Q.D. Patooties

If you love adorable mice then you'll be happy to know that Lisa Bunting Thoms of  Q.D. Patooties has an adorable mouse pattern to share. I hope you enjoy Lisa's mouse pattern.

Christmas Mouse Ornament Pattern

Copyright © 2007-2009 - All Rights Reserved - Lisa Bunting Thoms of Q.D. Patooties


Click on picture above to enlarge.

Here's the instructions and what Lisa said about her Christmas Mouse:  Remember that Mouse Ornament I showed you a couple of weeks ago that I made when I was a kid? It was my mom's design originally so I didn't think she would mind (yes, I talk to mom everyday and got the okay) if I updated it and made a new pattern (shown above) to share with you guys. 

All you need to do is to click on the pattern above and save it to your computer. After you click, the pattern will enlarge. Then, just right click and "Save Image As" to save it to your computer. 

When we made them about thirty years ago (yikes!), we used felt, some craft fur, a large pom pom, some glue-on googly eyes, a little ribbon and some pipe cleaners to make the candy cane. To make mine, I made a little pattern so you can make an actual body to fill the stocking instead of just stuffing it with Polyfil to make it look "occupied." I also added some arms so the mouse could hold on to the little candy cane. I also didn't have any "googly" eyes so I just backed a pair of black glass eyes with felt but you probably wouldn't need to do that if you used a lighter fabric. It's just that the fabric that I used was so dark, the eyes basically got lost in it.

I know you all can whip these out in no time because it's a very simple pattern to put together. If you are just learning to sew, here's some things I do to make it easier. First of all, I sewed from the front of the stocking to just about 3/4 around and then tacked it off. Next, I added my cuff to the top of the stocking. I found it was easier to do it this way then to try to add the cuff after the stocking was completely sewn up. However, if you are sewing by hand, just ignore this because I think it's easier to do the whole thing by hand. It's just that the project goes a lot quicker by machine. Oh, and what did I use for my whiskers? I used that waxed thread that you can buy in the leather jewelry department (they call it artificial sinew). It pulls apart rather nicely and really does end up looking like whiskers. I think my mom must have used broom bristles - at least that's what it feels like to me!

And can we talk about the change in the quality of pipe cleaners over the past 30 years? I made a candy cane out of two pipe cleaners and it looked like crud compared to my mom's candy cane and I thought geez, I can at least twist two pipe cleaners together. So I cleaned my glasses and looked at hers a little closer and it's an entirely different material! Her pipe cleaners are almost like those vintage bottle brush trees and are kind of velvety to the touch. She might have had hers in her stash for a while before she used them though. But ours nowadays don't even compare to the way hers looks when you compare finished projects. I ended up using some pre-striped pipe cleaners that I found in the Dollar Store. Even they were better than the ones sold at the craft store!

Anyway, have fun with the project. I might show some variations of it later on as I made a few (they are addictive!). Enjoy!

Please respect Lisa's TERMS OF USE:  My FREE tutorials, patterns, and how-to's are for personal use only and are not not intended for commercial use. They may not be copied, reprinted, emailed, or reproduced and distributed in any manner without my permission.

Lisa's Bio: Lisa is a professional teddy bear artist selling heirloom quality collectible bears to Adults and has been making bears professionally since November 1997. Her creations have been nominated for several Awards including the TITA, Teddy Bear Scene Reader's Choice Awards and the Ace Awards. They've also been included on a regular basis in many of the major doll and crafts magazines.

Copyright © 2007-2012 - All Rights Reserved - Lisa Bunting Thoms of Q.D. Patooties at http://qdpatooties.blogspot.com.

Please visit Lisa's Q.D. Patooties Spoonflower Fabric Shop and her Q.D. Patooties Etsy Shop.

Felt Snow Bunny Ornament Free Pattern by Lisa Bunting Thoms of Q. D. Patooties

I thought you might all like to know that Lisa Bunting Thoms of  Q.D. Patooties  has a wonderful bunny ornament pattern to share.  I know you're going to love it.

Free Felt Snow Bunny Ornament Pattern
Copyright © 2007 - All Rights Reserved - Lisa Bunting Thoms of Q.D. Patooties


Click on picture above to enlarge.

Here's the instructions and what Lisa had to say about her Felt Snow Bunny Ornament Pattern:  Okay, this is probably the last free pattern before Christmas. But thankfully, you can use this one for Easter too! So hang on to it and file it away in your stash. It's incredibly simple but I think it works up really cute. It's small enough that besides being an ornament, it would also make a cute package decoration or even a pin. Or stick one of those magnets on the back and put him on your fridge! And Snow Bunnies stick around all winter unlike Snowmen who are a little less reliable - especially in warmer weather!


All you need to do is to click on the pattern above and save it to your computer. After you click, the pattern will enlarge. Then, just right click and "Save Image As" to save it to your computer. 

Anyway, my only hints with this pattern are in order to work this small (hey, it's small for me) I traced my pattern onto a piece of felt, folded the felt over and then sewed directly on the outline of the bunny. I left the side open for stuffing. You can wire his ears if you like with chenille pipe cleaners. Then you won't have to stuff them and they'll be poseable. Along those same lines, you could wire the whole bunny if you like and not stuff him at all. Just make him a little poseable guy to put where ever you want. Oh, and finally the face and other features I embroidered but you can do whatever you want with your bunny. I'm not going to come inspect them or anything! And I just used a few strands of that fancy yarn for my scarf. I really love that yarn and wish I could find more as it's both soft and sparkly - gotta love it!

Enjoy!


Please respect Lisa's TERMS OF USE:  My FREE tutorials, patterns, and how-to's are for personal use only and are not not intended for commercial use. They may not be copied, reprinted, emailed, or reproduced and distributed in any manner without my permission.

Lisa's Bio: Lisa is a professional teddy bear artist selling heirloom quality collectible bears to Adults and has been making bears professionally since November 1997. Her creations have been nominated for several Awards including the TITA, Teddy Bear Scene Reader's Choice Awards and the Ace Awards. They've also been included on a regular basis in many of the major doll and crafts magazines.

Copyright © 2007-2012 - All Rights Reserved - Lisa Bunting Thoms of Q.D. Patooties at http://qdpatooties.blogspot.com.

Please visit Lisa's Q.D. Patooties Spoonflower Fabric Shop and her Q.D. Patooties Etsy Shop.

Super Sweet Snowman Free Pattern by Lisa Bunting Thoms of Q.D. Patooties

I thought you might all like to know that Lisa Bunting Thoms of  Q.D. Patooties has a wonderful snowman doll pattern to share that I know you're going to love.


Super Sweet Snowman Pattern
Copyright © 2007 - All Rights Reserved - Lisa Bunting Thoms of Q.D. Patooties


CLICK on picture above to enlarge.

Here's the instructions and what Lisa had to say about her Super Sweet Snowman pattern:  Well Christmas may be over but we still have time for Snowmen! At least until March when the weather warms up and the last snowflake disappears. I made this Super Sweet Snowman out of a fat quarter of Alpaca/Cotton Blend batting from Pacafil. To help him stand upright, I used some weighted beads in the bottom of my snowman. I sewed the snowman's body together including the base and then stuffed from the neck opening. Since this batting does have some stretch, it was easy to do. If you're using a fabric with no stretch, leave an opening on the side for stuffing. For the head, I left one of the sides of the snowman's head open a little and then stitched it closed after I stuffed it. The hat hid the hand stitching so it's not even noticeable.

The pattern I made for you includes the pieces for the snowman's head and body. For the hat, I just took a wool sock and cut a tube from it that stood up on his head and added about four extra inches to his height. Then, I just gathered it as close to his head as possible with some embroidery floss and fringed the top to look like a pom pom. I sewed my hat onto the head but you don't have to do that if you don't want to as you may prefer to decorate yours differently. The felt snowman hats that you purchase at your local craft store fit this pattern perfectly. Since the batting has some stretch to it, your snowman will turn out taller than in the pattern. If you use a fabric that doesn't have much stretch, he will be a little stubbier so take that into consideration when you pick your fabric. Or, you may want to just add on a couple of inches to the bottom of your pattern to give him a little more height. I also did not include the pattern for the nose because you may prefer to use a button nose. If you want to make a carrot nose like I did, I took a piece of orange wool felt that was about 2 inches in length and then cut it at an angle. 

Anyway, have fun with this winter project and make yourself a chilly little friend. You can really make him prim if you like or you can make him really contemporary by using some funky fleece. If you make one, please send me a picture as I'd love to see it!
All you need to do is to click on the pattern below and save it to your computer. After you click, the pattern will enlarge. Then, just right click and "Save Image As" to save it to your computer. 

Enjoy!


Please respect Lisa's TERMS OF USE:  My FREE tutorials, patterns, and how-to's are for personal use only and are not not intended for commercial use. They may not be copied, reprinted, emailed, or reproduced and distributed in any manner without my permission.

Lisa's Bio: Lisa is a professional teddy bear artist selling heirloom quality collectible bears to Adults and has been making bears professionally since November 1997. Her creations have been nominated for several Awards including the TITA, Teddy Bear Scene Reader's Choice Awards and the Ace Awards. They've also been included on a regular basis in many of the major doll and crafts magazines.

Copyright © 2007-2012 - All Rights Reserved - Lisa Bunting Thoms of Q.D. Patooties at http://qdpatooties.blogspot.com.

Please visit Lisa's Q.D. Patooties Spoonflower Fabric Shop and her Q.D. Patooties Etsy Shop.
Powered by Blogger.